Survey Builder
How to Add and Name Survey Blocks
Group questions into named blocks to organize long surveys, apply section-level logic, and keep the canvas navigable.
Overview
Group questions into named blocks to organize long surveys, apply section-level logic, and keep the canvas navigable. Blocks are the survey's chapters.
Step-by-step
Add a block — click Block in the builder toolbar (next to + Question). A new, empty block appears at the end of the survey.
Name it — give the block a descriptive section name like "Screening & Profile" or "Ratings & Scales". Block names appear as filter chips above the canvas and as sections in the Outline.
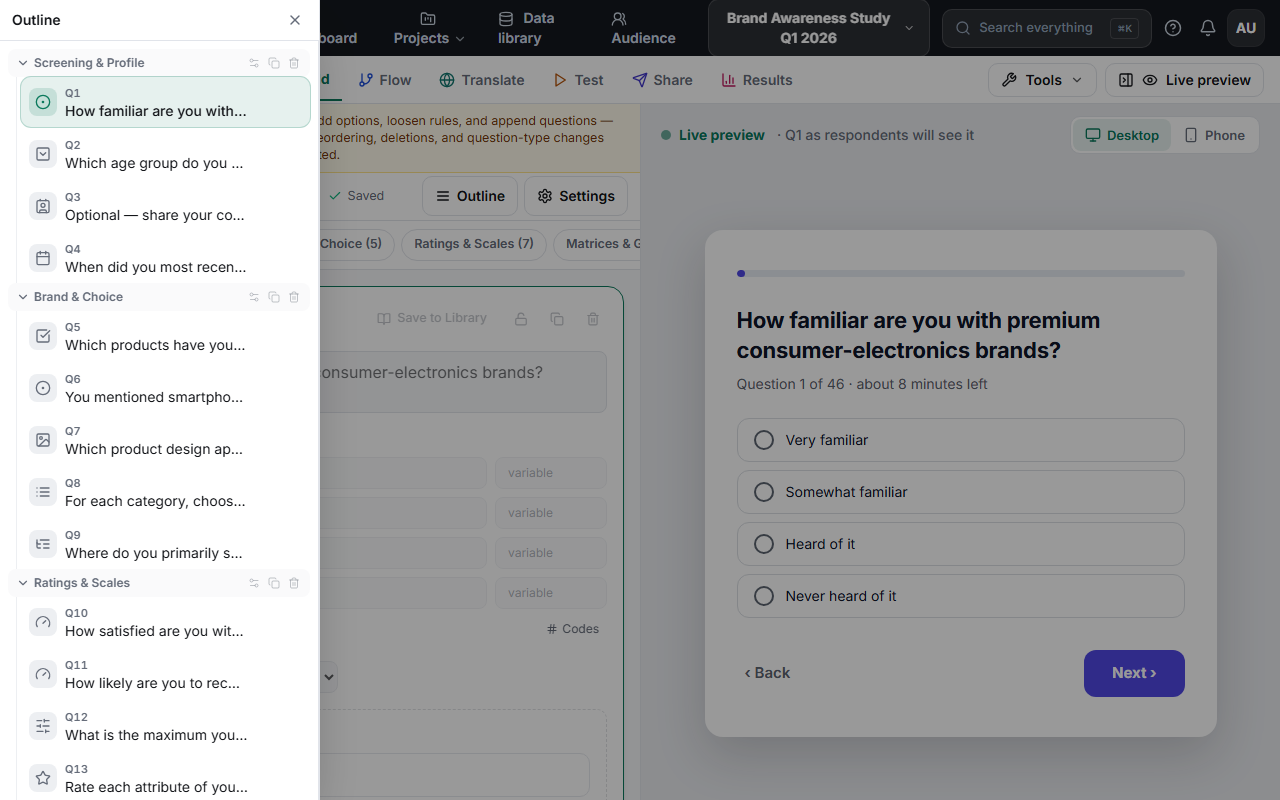
Move questions into it — drag question cards into the block, or open a question's Settings drawer and change its Block dropdown.
Navigate by block — click a block chip above the canvas to filter to just that section. On a 40-question survey this is the difference between scrolling and working.
Key options
| Option | What it does |
|---|---|
| Block chips | Filter the canvas to one section |
| Outline | See and navigate all blocks and questions at once |
| Randomize blocks (Tools menu) | Rotate block order across respondents |
| Block dropdown (question Settings) | Move a question between blocks without dragging |
Tips
Tip: Name blocks for the respondent journey (Screening → Core questions → Demographics), not internal jargon — the names help you spot ordering problems at a glance.
Related articles
- Reordering Questions by Dragging and Dropping — moving questions between blocks
- How to Add a Question to Your Survey — new questions land in the current block