Survey Builder
Customizing the Survey Completion Screen Message
Replace the default thank-you page with your own title and message — with piped answers and embedded data if you want it personal.
Overview
Replace the default thank-you page with your own title and message — with piped answers and embedded data if you want it personal. Each exit state (completed, screened out, quota full) has its own screen.
Step-by-step
Open Survey settings — in the builder, open Tools → Survey settings and scroll to End screens.
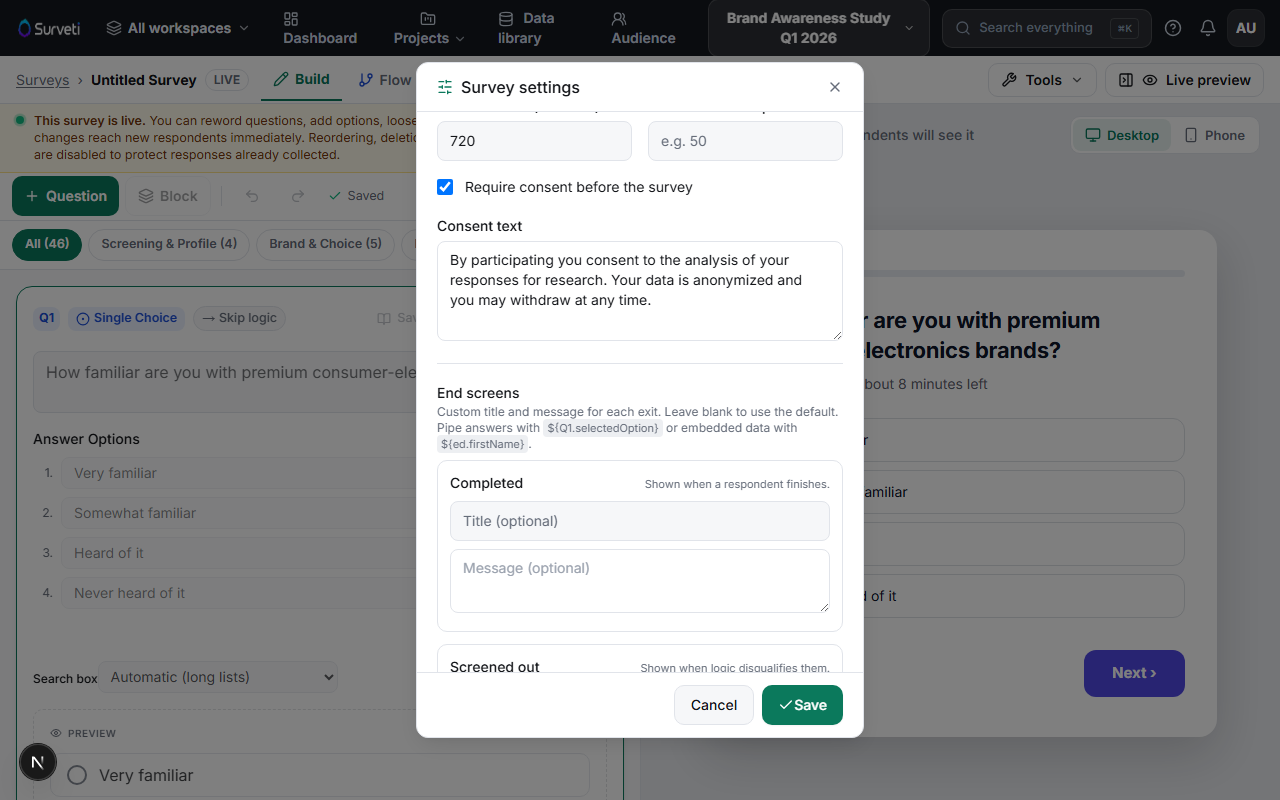
Fill in the Completed screen — a Title and Message, both optional; leave them blank to use the default "Thank you" copy. This screen is "shown when a respondent finishes."
Personalize with tokens if you like — pipe answers with
${Q1.selectedOption}or embedded data with${ed.firstName}, exactly as the panel's hint shows.Cover the other exits — the same section holds screens for Screened out, Quota full, and security failures, so every way out of your survey ends on-message.
Save and test — click Save, then complete a test run from the Test tab to see your message live.
Tips
Tip: Tell respondents what happens next — "Results are shared quarterly" or "We read every answer" closes the loop and makes the next survey invitation more welcome.
Note: If you need respondents to land somewhere specific after finishing (a portal, a reward page), a post-completion redirect replaces the thank-you screen entirely — a separate setting from these messages.
Related articles
- Editing the Survey Welcome Screen and Start Button Text — the entry side
- Piping a Prior Answer into a Later Question — how tokens work
- Setting Up Screen-Out Logic to Disqualify Respondents — the screened-out exit