Distribution & Fieldwork
Managing Respondent Data in the Respondents Workbench
Find, inspect, correct and annotate individual respondents — status changes, answer edits, notes, tags, saved views and exports.
Overview
The Respondents workbench is where you work on one record at a time instead of on totals: find a respondent, read what they answered, correct a status or an answer, annotate them for the rest of the team, and export the set you end up with. Open it from a project — Projects → your project → Respondents.
Researcher and above can use it. Every change is written to the respondent's history with your name, the reason you gave and what the value was before, so nothing here is silent and almost nothing is permanent.
Step-by-step
Find the respondents you want — search by respondent ID, panel ID or email address, then narrow with the chips: Survey, Status, Fraud, Source, Tags and Test rows. The tiles under the search box count the whole filtered set by status, and clicking one filters to it. The number beside the chips is the base you are working on.
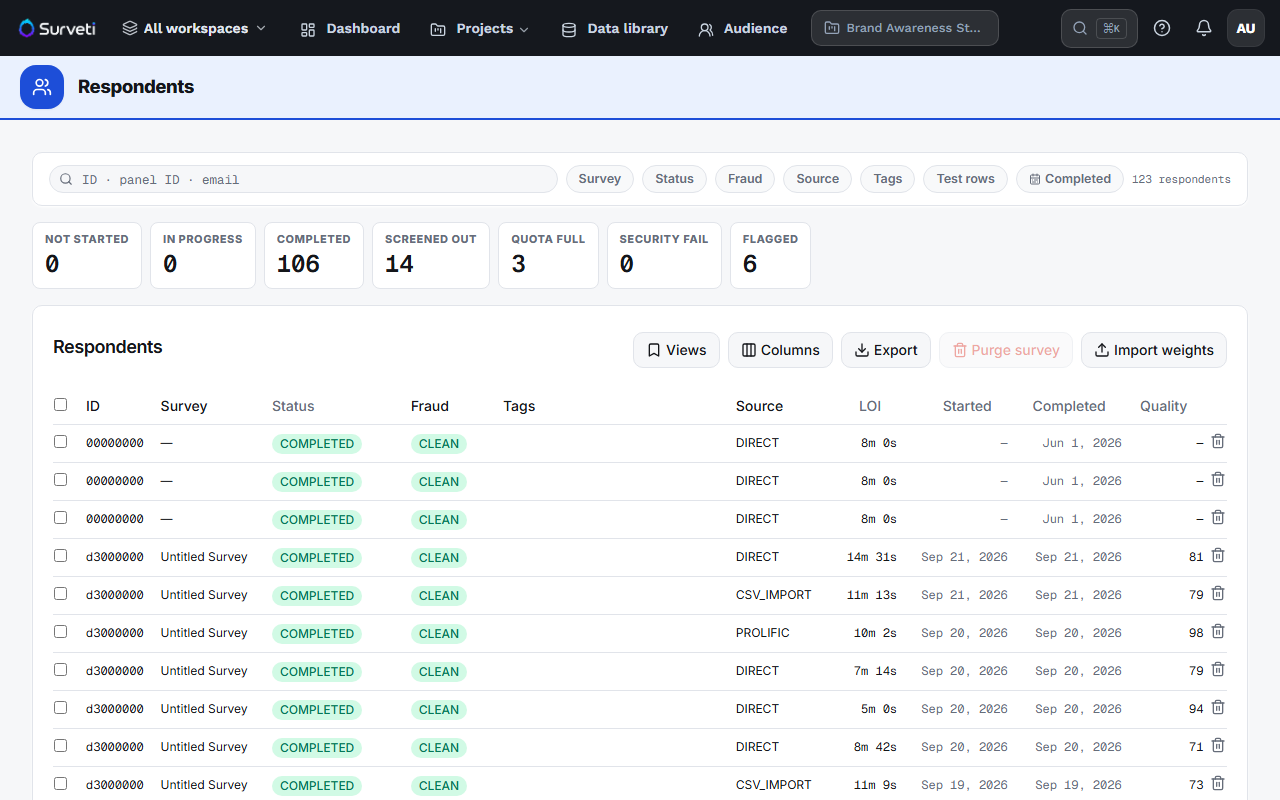
Open a respondent — click the row. The drawer has four tabs: Responses for every answer they gave, History for every change anyone has made, Notes for internal comments, and Details for the identifiers, timings, source and quality score. The arrows at the top move to the next respondent in the filtered list without closing the drawer.
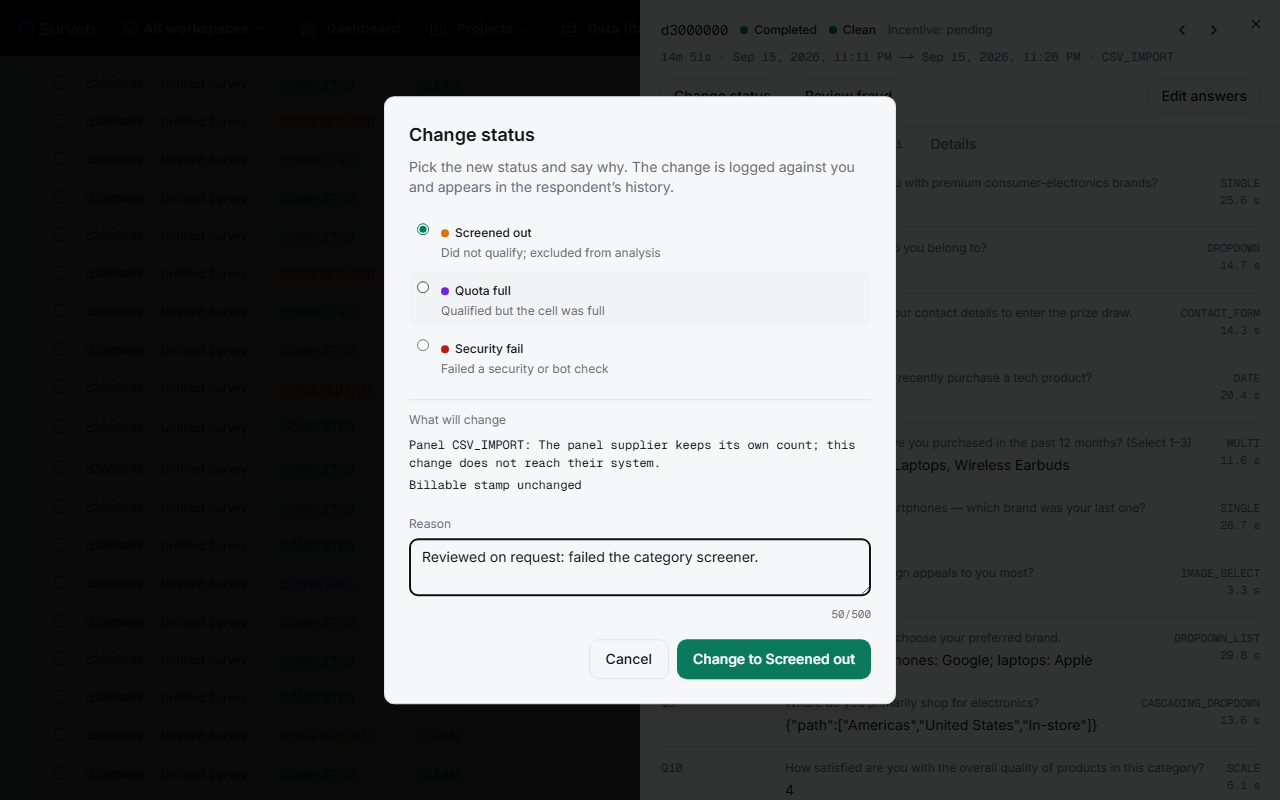
Change a status — click Change status, pick the new status and say why. The reason is required. Before you confirm, the dialog shows what the change will do beyond the status itself: which quota cells it moves, whether the billable complete stamp changes, and whether an incentive would be voided. After you confirm, a toast offers Undo for 12 seconds — except when the change voided an incentive, where no Undo is offered and you revert from the History tab instead. Reviewing a fraud flag is a separate action (Review fraud), because rejecting a respondent also screens them out.
Correct an answer — click Edit answers on the Responses tab. Each question becomes editable on its own row, and each row saves on its own, with an optional reason. Answers Surveti did not collect as typed values cannot be edited: uploaded media, signatures, conjoint and MaxDiff tasks, and computed variables are read-only. Recompute a computed variable rather than editing it.
Undo anything from History — the History tab lists every status change, fraud decision, weight change, answer edit, tag change and note, newest first, and offers Revert on all but notes. Reverting writes the old value back and leaves its own row in the log, so the record shows both the change and the correction. When a change voided an incentive, the Undo toast is withheld and you revert from here instead, confirming as you go.
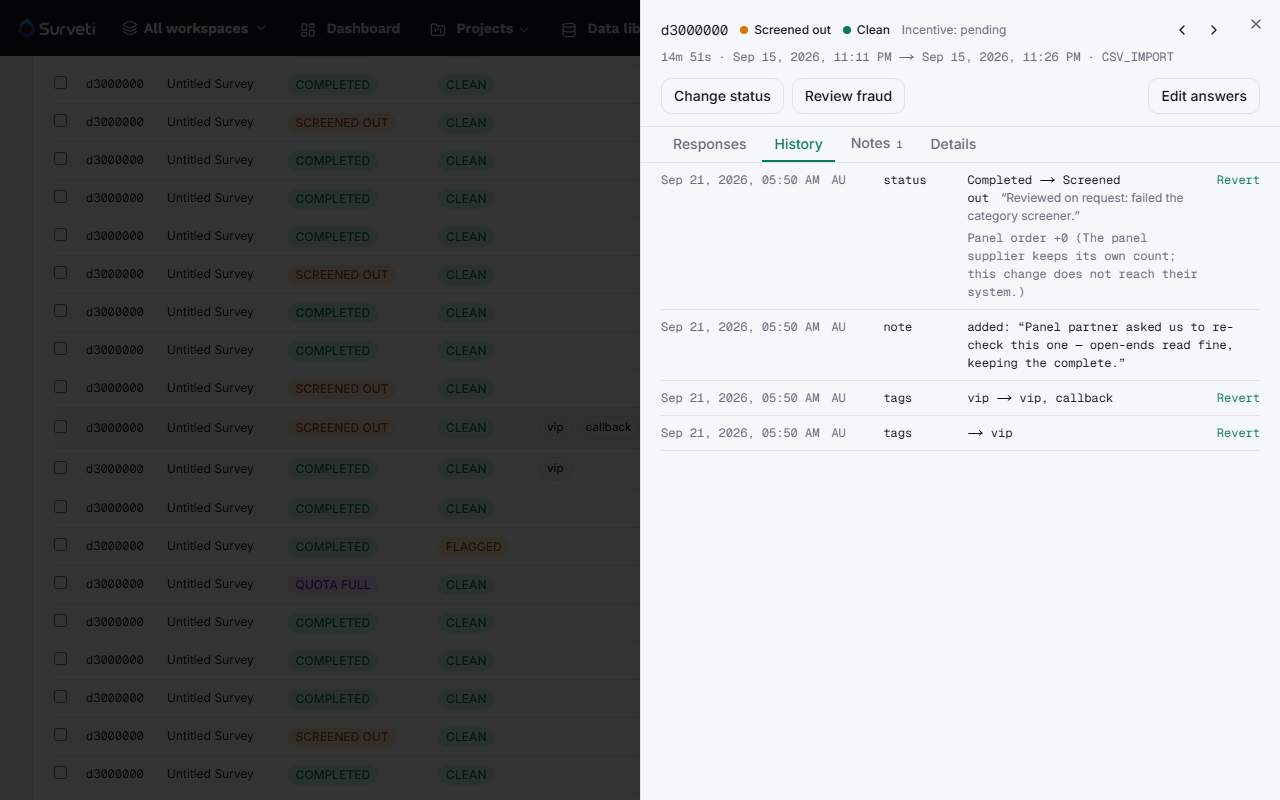
Add notes and tags — notes are internal. They never appear in an export and never in the client portal, only the author can edit one, and a workspace admin can delete it. Tags are the opposite: they are lower-cased, up to 32 characters, up to 20 per respondent, they filter the table through the Tags chip, and they come out in exports as a
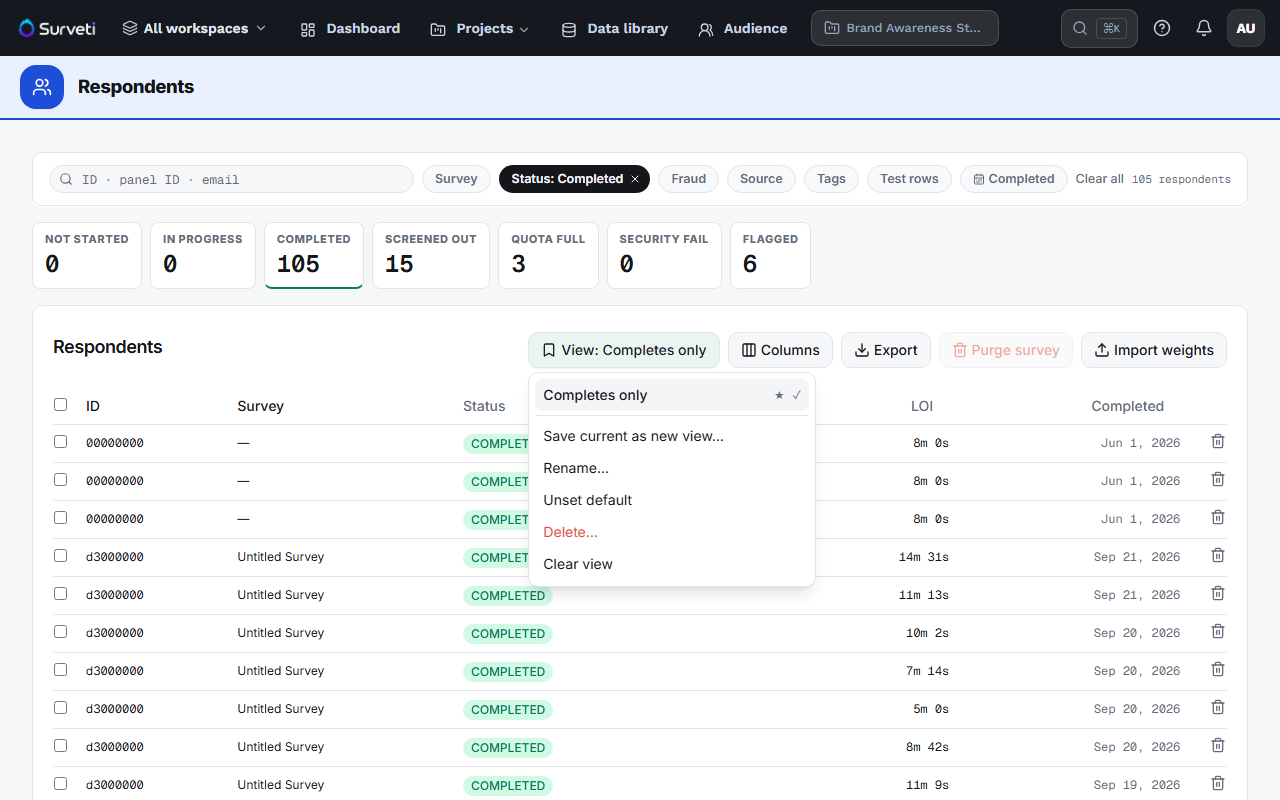
tagscolumn. Tick rows in the table to tag or untag several at once; the bulk bar also does status, fraud, export and delete, and reports the result row by row.Save a view and choose columns — the Columns menu picks which columns the table shows and in what order, remembered in your browser. The Views menu saves the current filters, columns and sort as a named view that everyone on the project can apply, and one view per project can be starred as the default that loads first. The creator and workspace admins can rename or delete a view. While a view is active, its columns win over your browser's.
Export what you are looking at — Export sends either the rows you ticked (up to 500) or the whole filtered set to the usual export job, in CSV, Excel, SPSS or JSON. The file is built in the background and appears in your exports when it is ready. Test rows are left out unless you tick them in.
Tips
Tip: Give a real reason on every change. It is stored in the ledger next to the change and is the only thing that will explain, months later, why a complete became a screen-out.
Note: A status change reconciles quotas and can void an incentive. The preview in the dialog tells you both before you confirm — read it rather than confirming and relying on Undo.
Note: Notes are staff-only. If something has to reach a client, put it in the report, not in a note.
Related articles
- Understanding the Fraud Signals That Cause a Respondent to Be Flagged — what the fraud flags mean
- Excluding Fraud-Flagged Responses from Analysis and Exports — keeping flagged rows out of your numbers
- Exporting Survey Responses as a Flat CSV File — the export the workbench hands off to
- Controlling PII, Open Ends, and Weights Included in an Export — what an export may contain