Distribution & Fieldwork
How to Create and Send Your First Email Campaign
Invite a contact list to your survey by email, with a personalized invitation and per-recipient tracking.
Overview
Invite a contact list to your survey by email, with a personalized invitation and per-recipient tracking. Each recipient gets their own survey link, so you know exactly who responded.
Prerequisites
- A Live survey and a contact list under Audience — see Importing Contacts from a CSV File into a Contact List.
- Email campaigns require the Solo plan or above.
Step-by-step
Open the Campaigns channel — in the builder, go to the Share tab and click Campaigns, then New campaign.
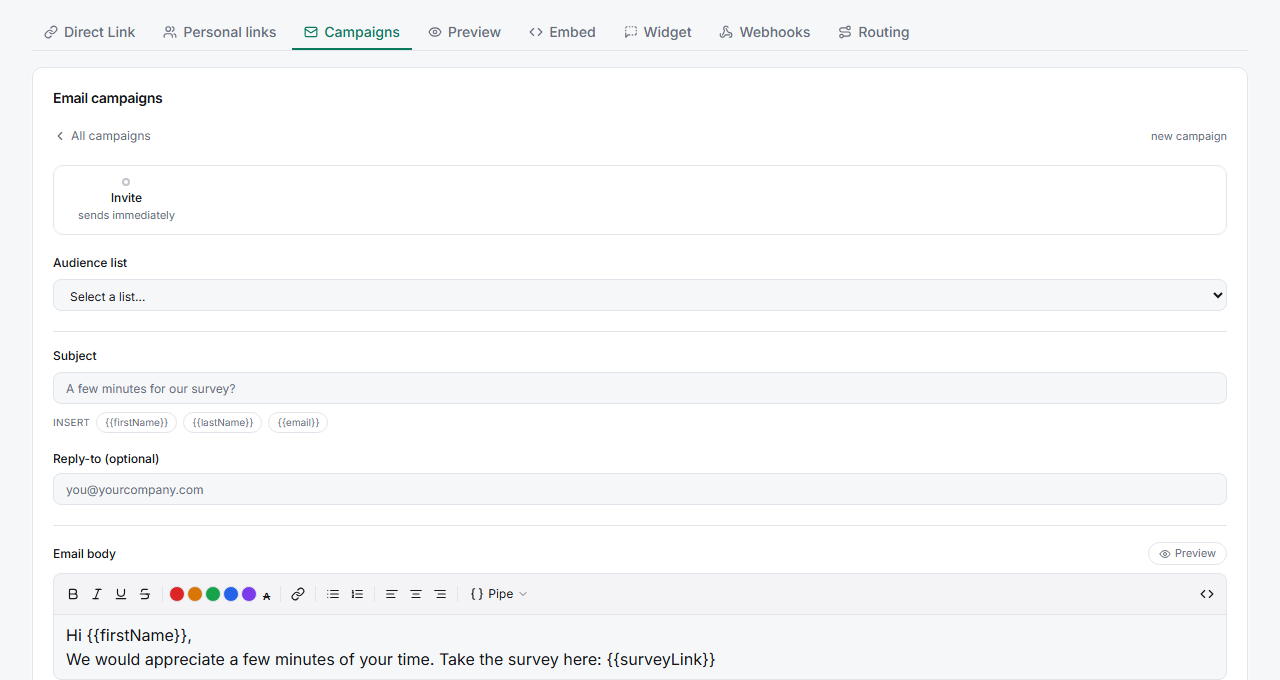
Pick the Audience list — choose which contact list to invite from the Audience list dropdown.
Write the subject and body — use the INSERT merge tokens (
{{firstName}},{{lastName}},{{email}}) to personalize, and include the required{{surveyLink}}token so each recipient gets their unique link.Set a Reply-to (optional) — an address respondents can reply to.
Review and send — the Review step shows recipient count and your remaining email quota; confirm to send immediately (or schedule it).
Tips
Tip: Send yourself a test first (see Sending a Test Email to Preview Your Campaign Before Launch) — merge tokens and links are much easier to catch in your inbox than in the composer.
Note:
{{surveyLink}}is required. Without it, recipients have no way into the survey — the composer flags its absence.
Related articles
- Using Merge Variables to Personalize Campaign Emails — the tokens in detail
- Scheduling an Email Campaign for a Future Date and Time — send later
- Setting Up Automated Follow-Up Reminder Emails for Non-Respondents — chase non-completes